🐳 Whistle is a tool for building and deploying web applications. It is a command line tool that allows you to build and deploy your web application to a server. It is written in Go and is available for Linux, macOS, and Windows.
安装和启动 1 2 3 4 npm i whistle -g w2 start
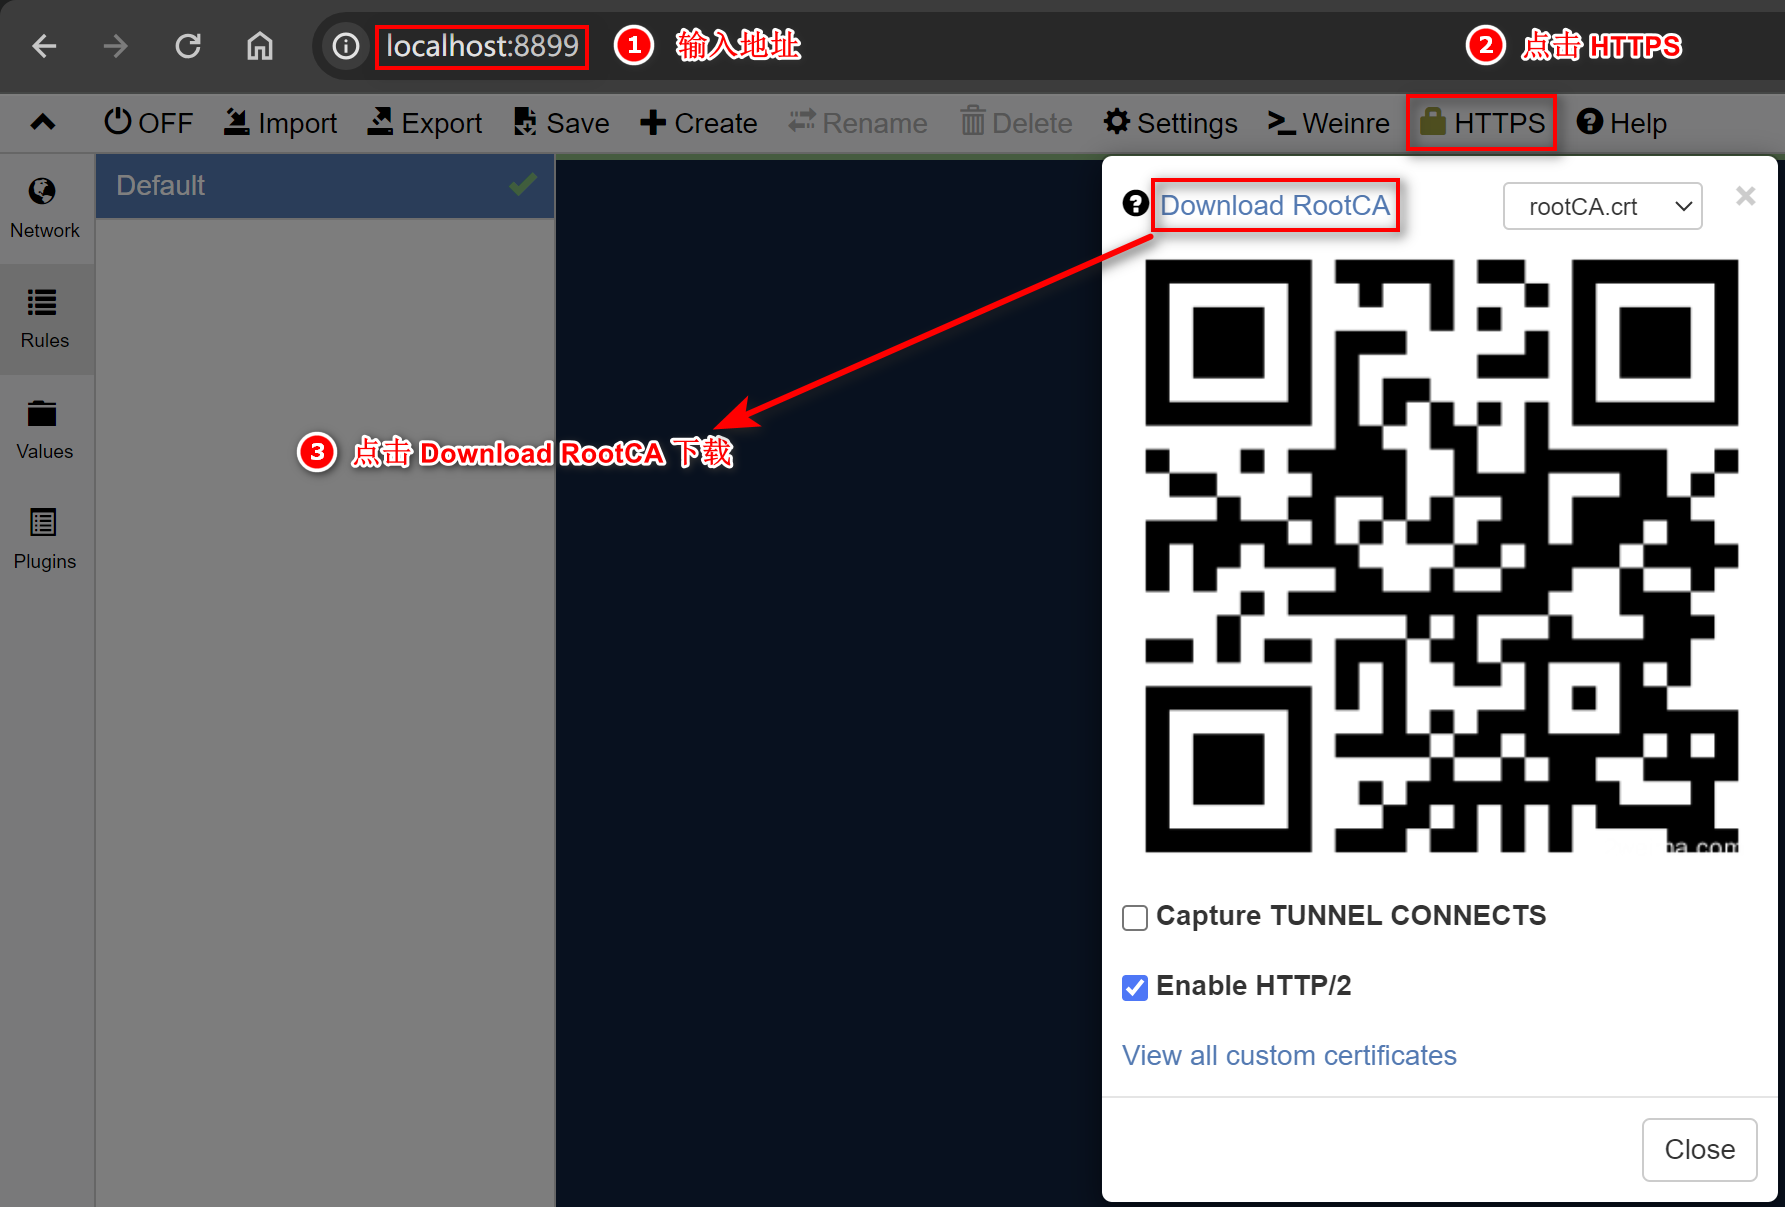
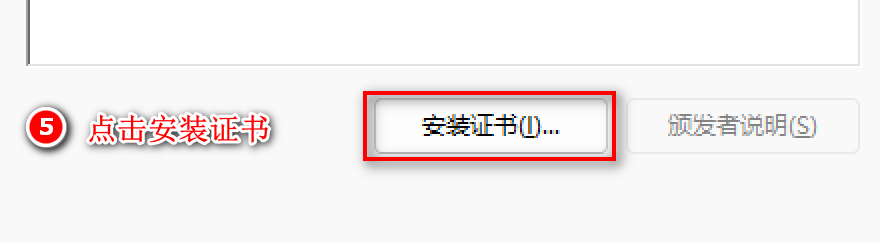
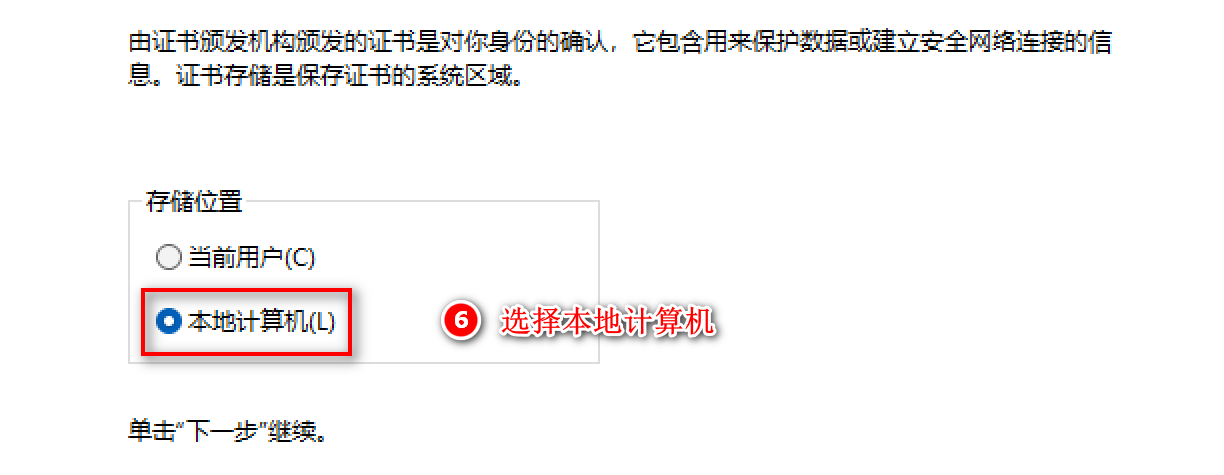
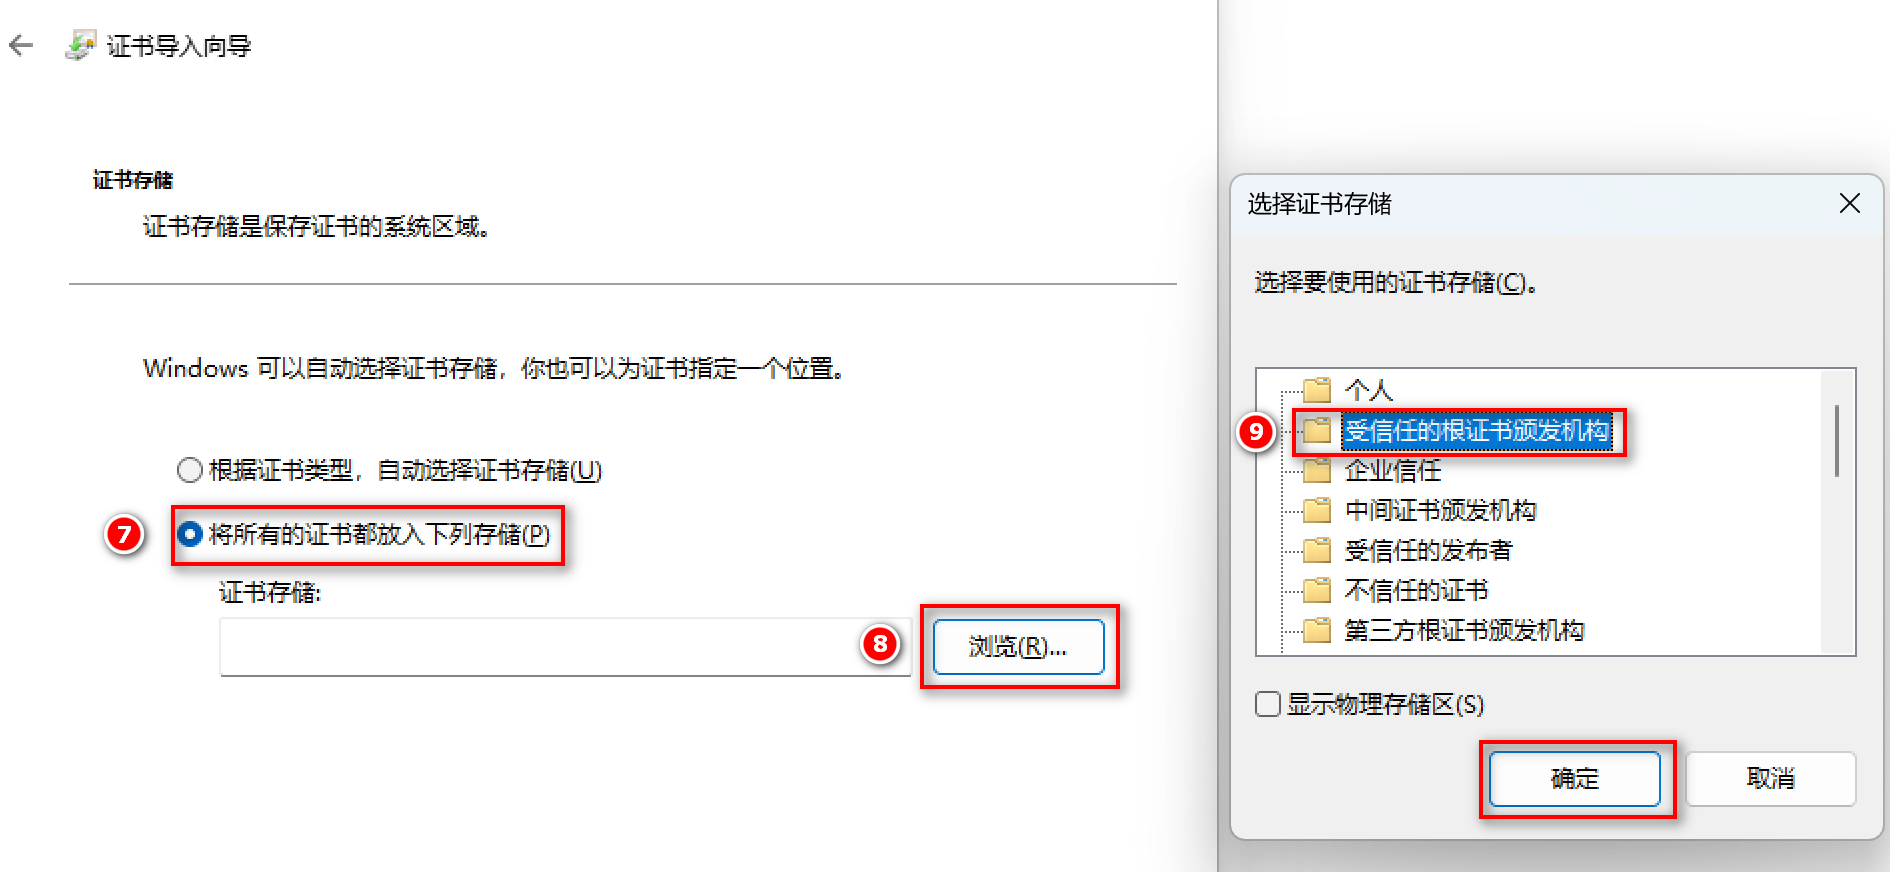
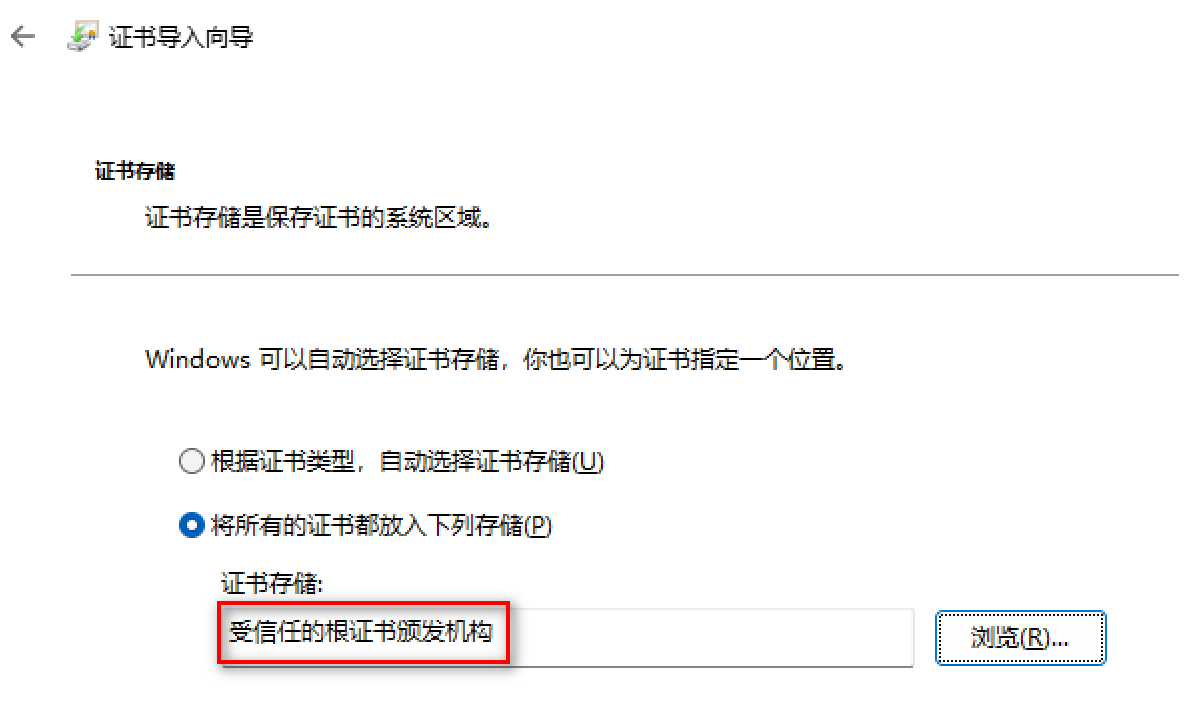
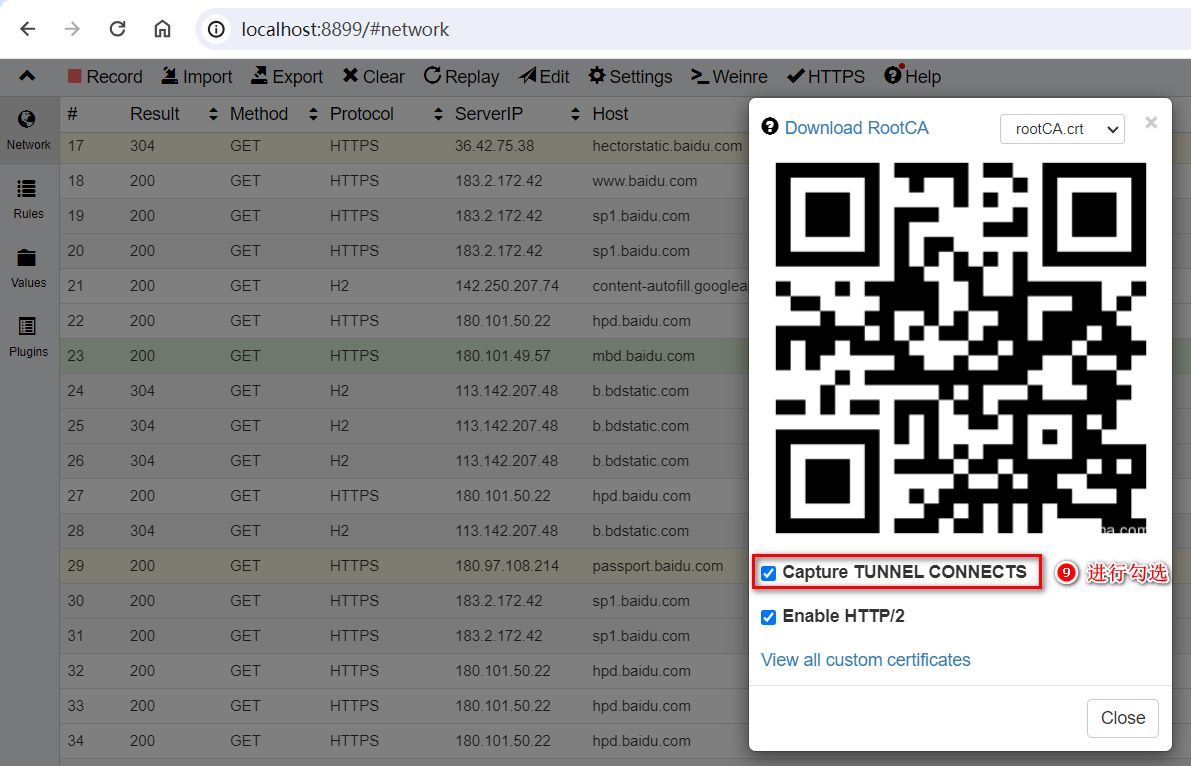
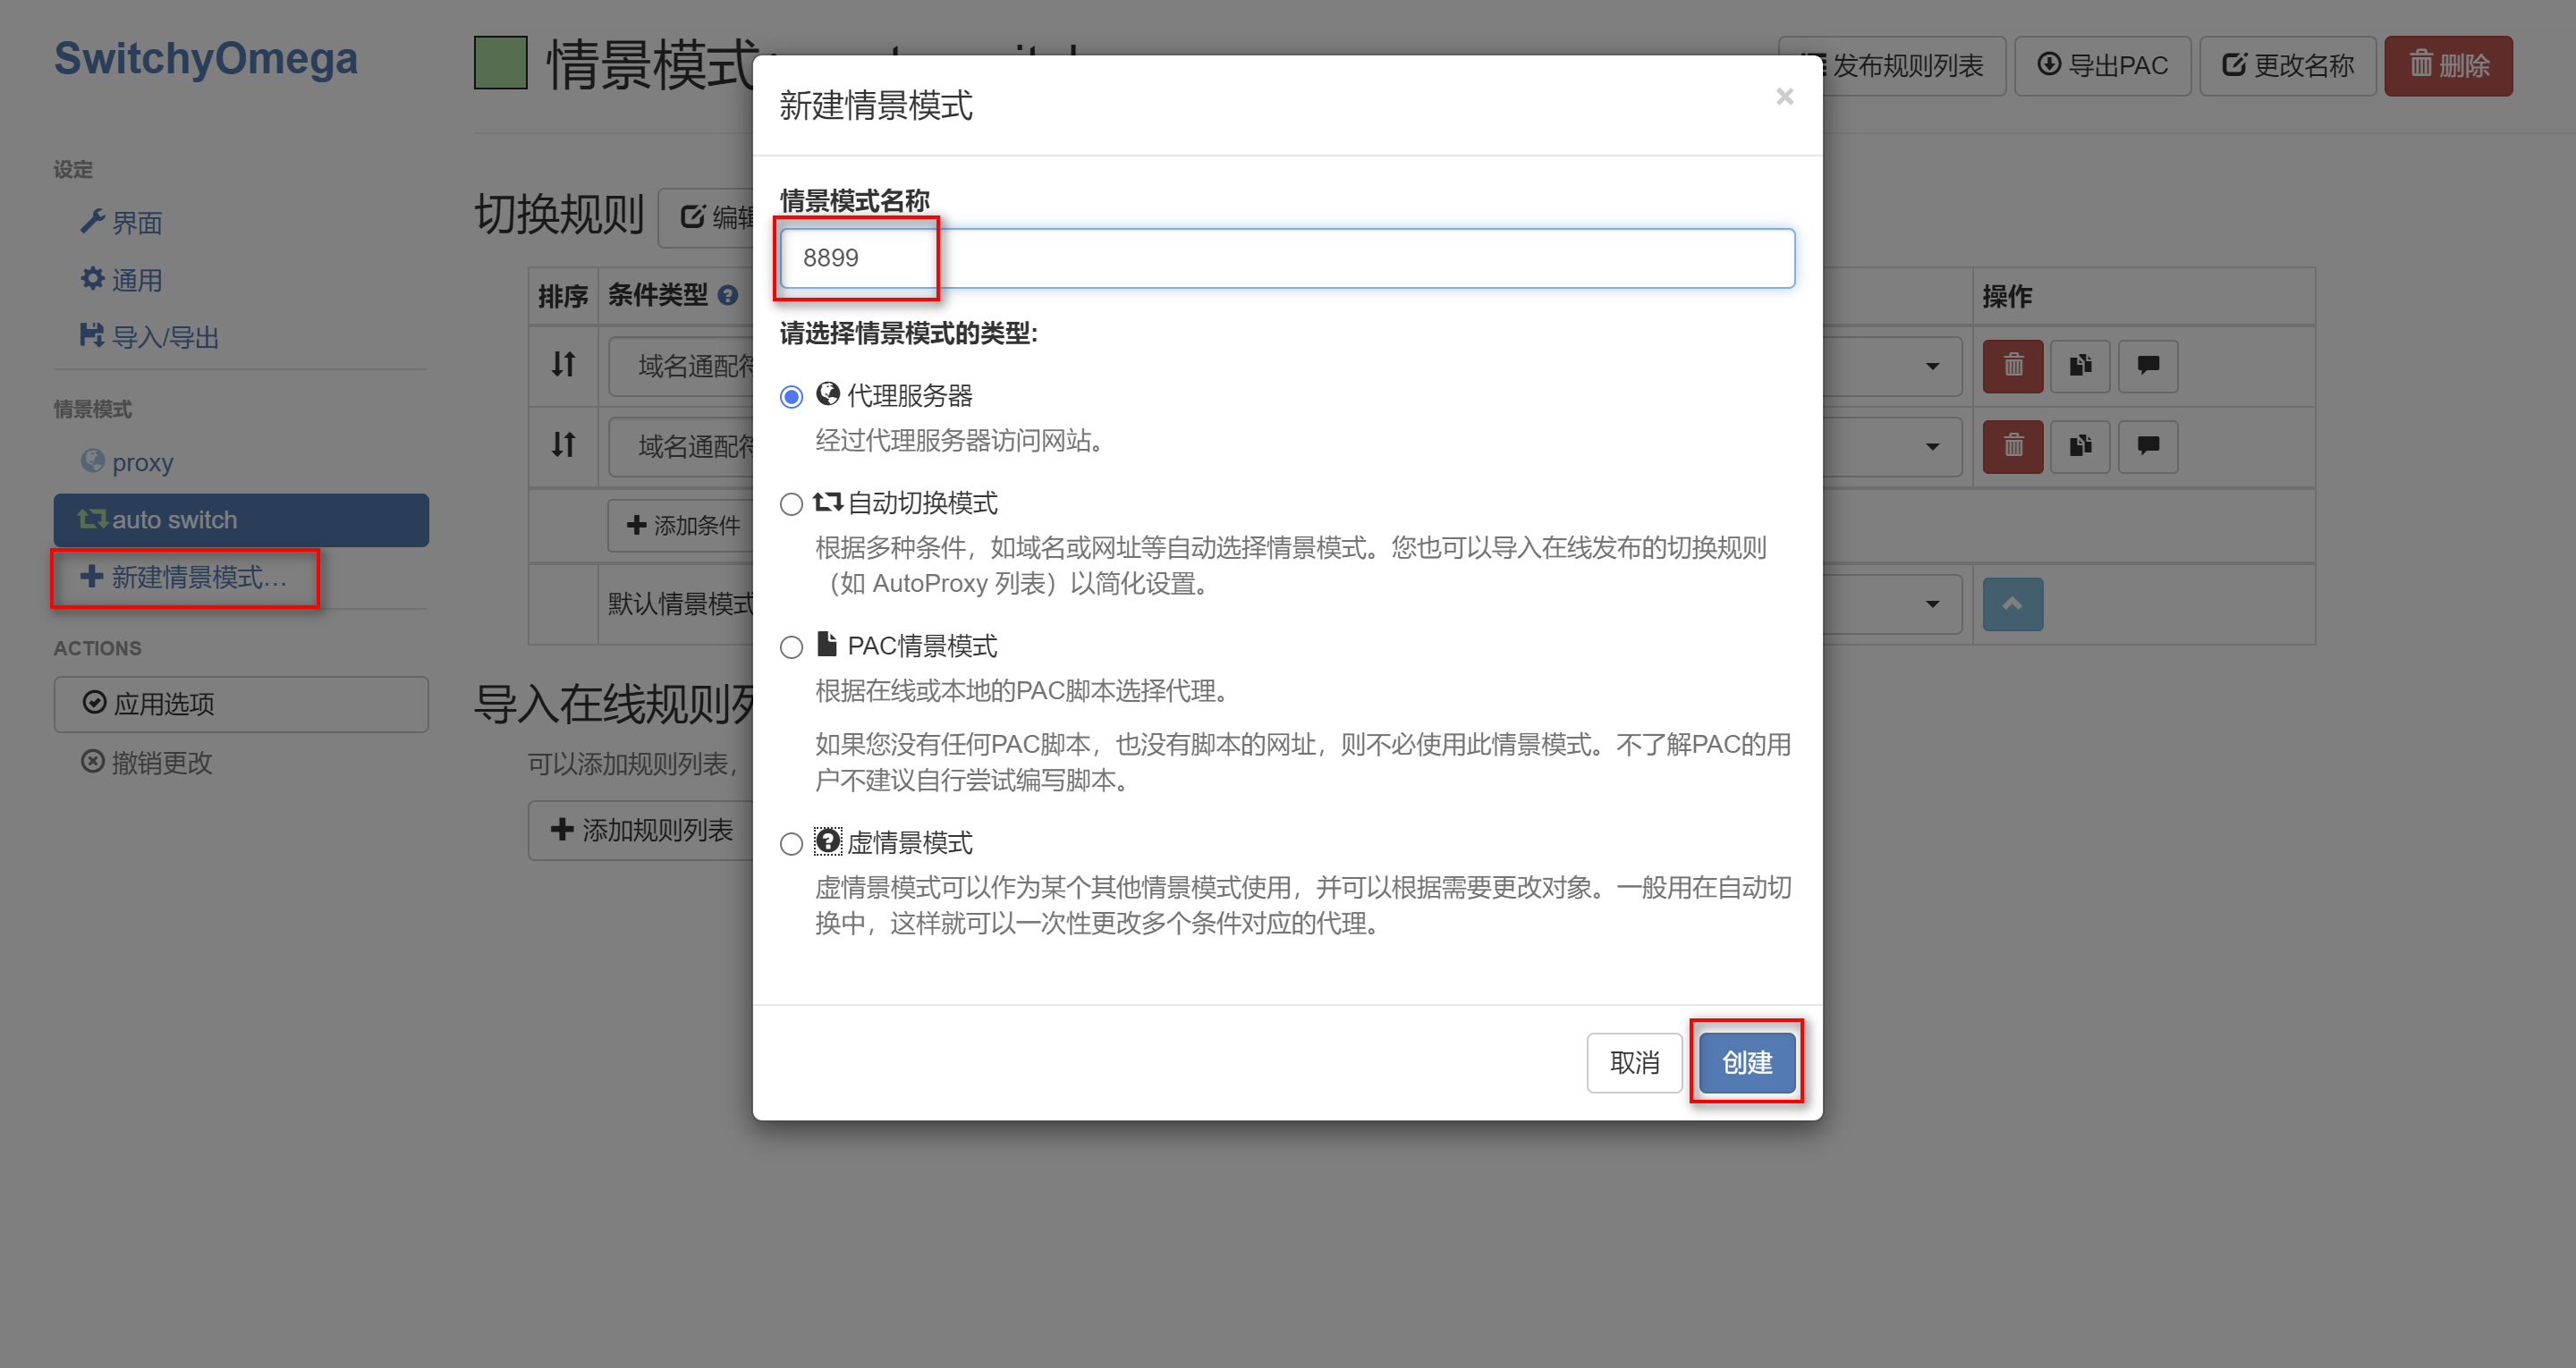
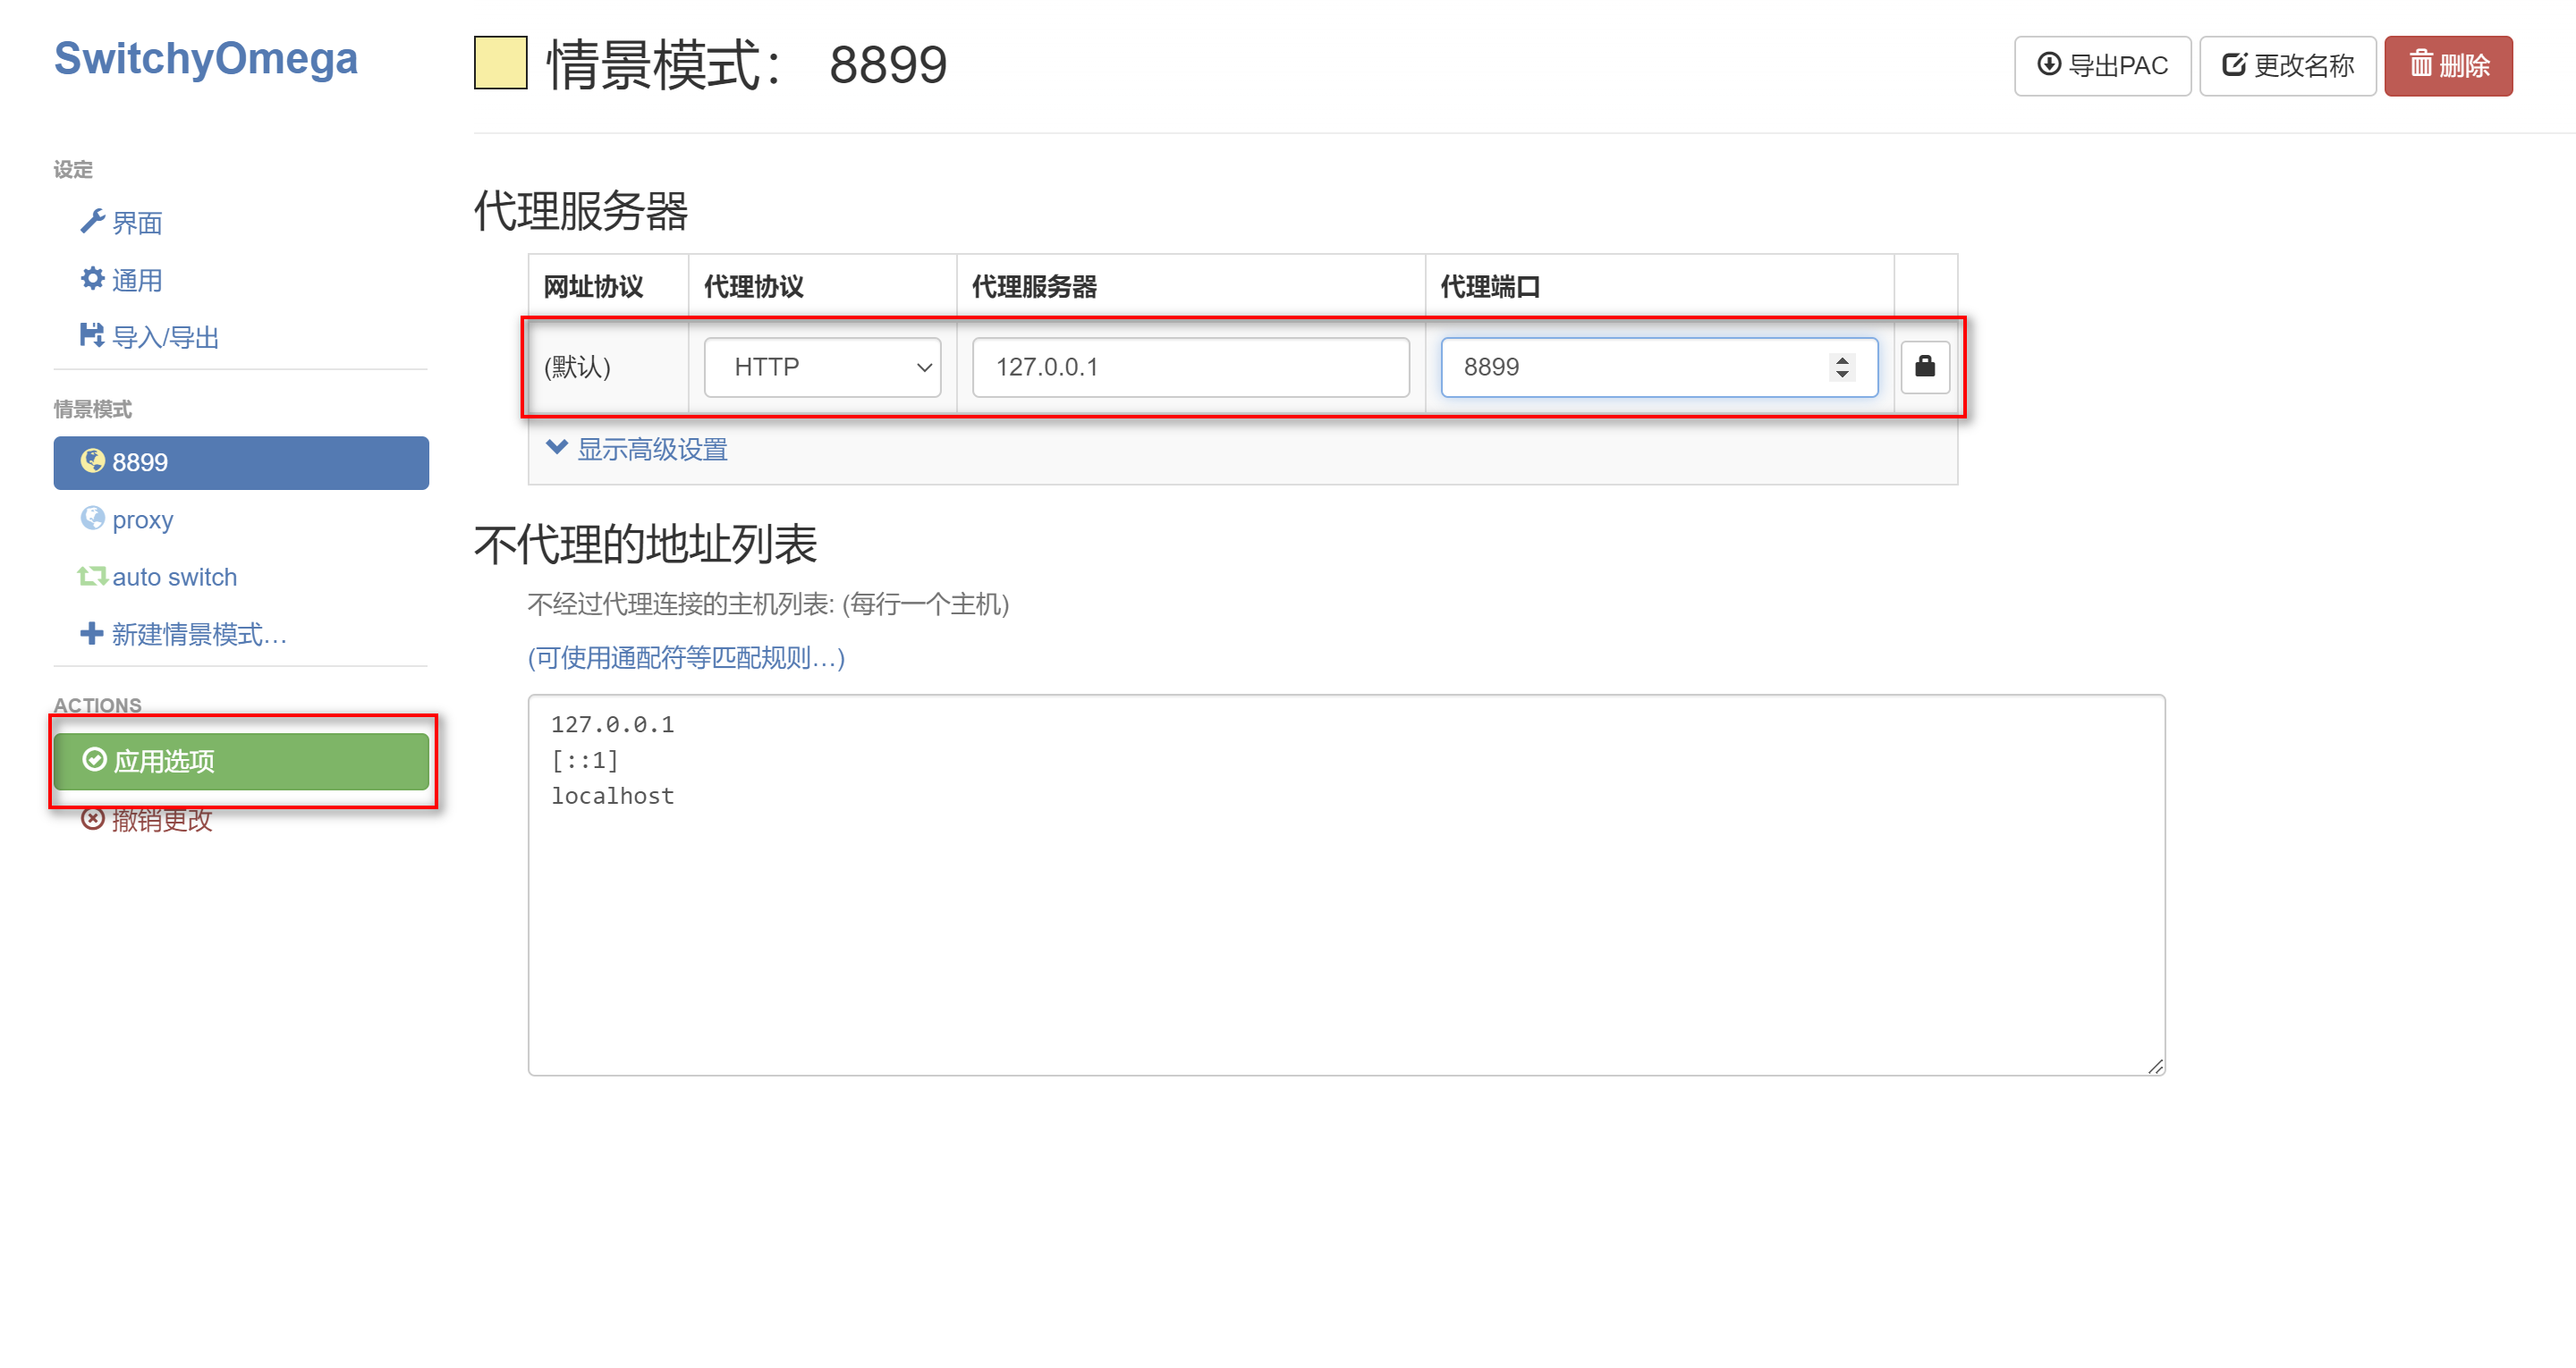
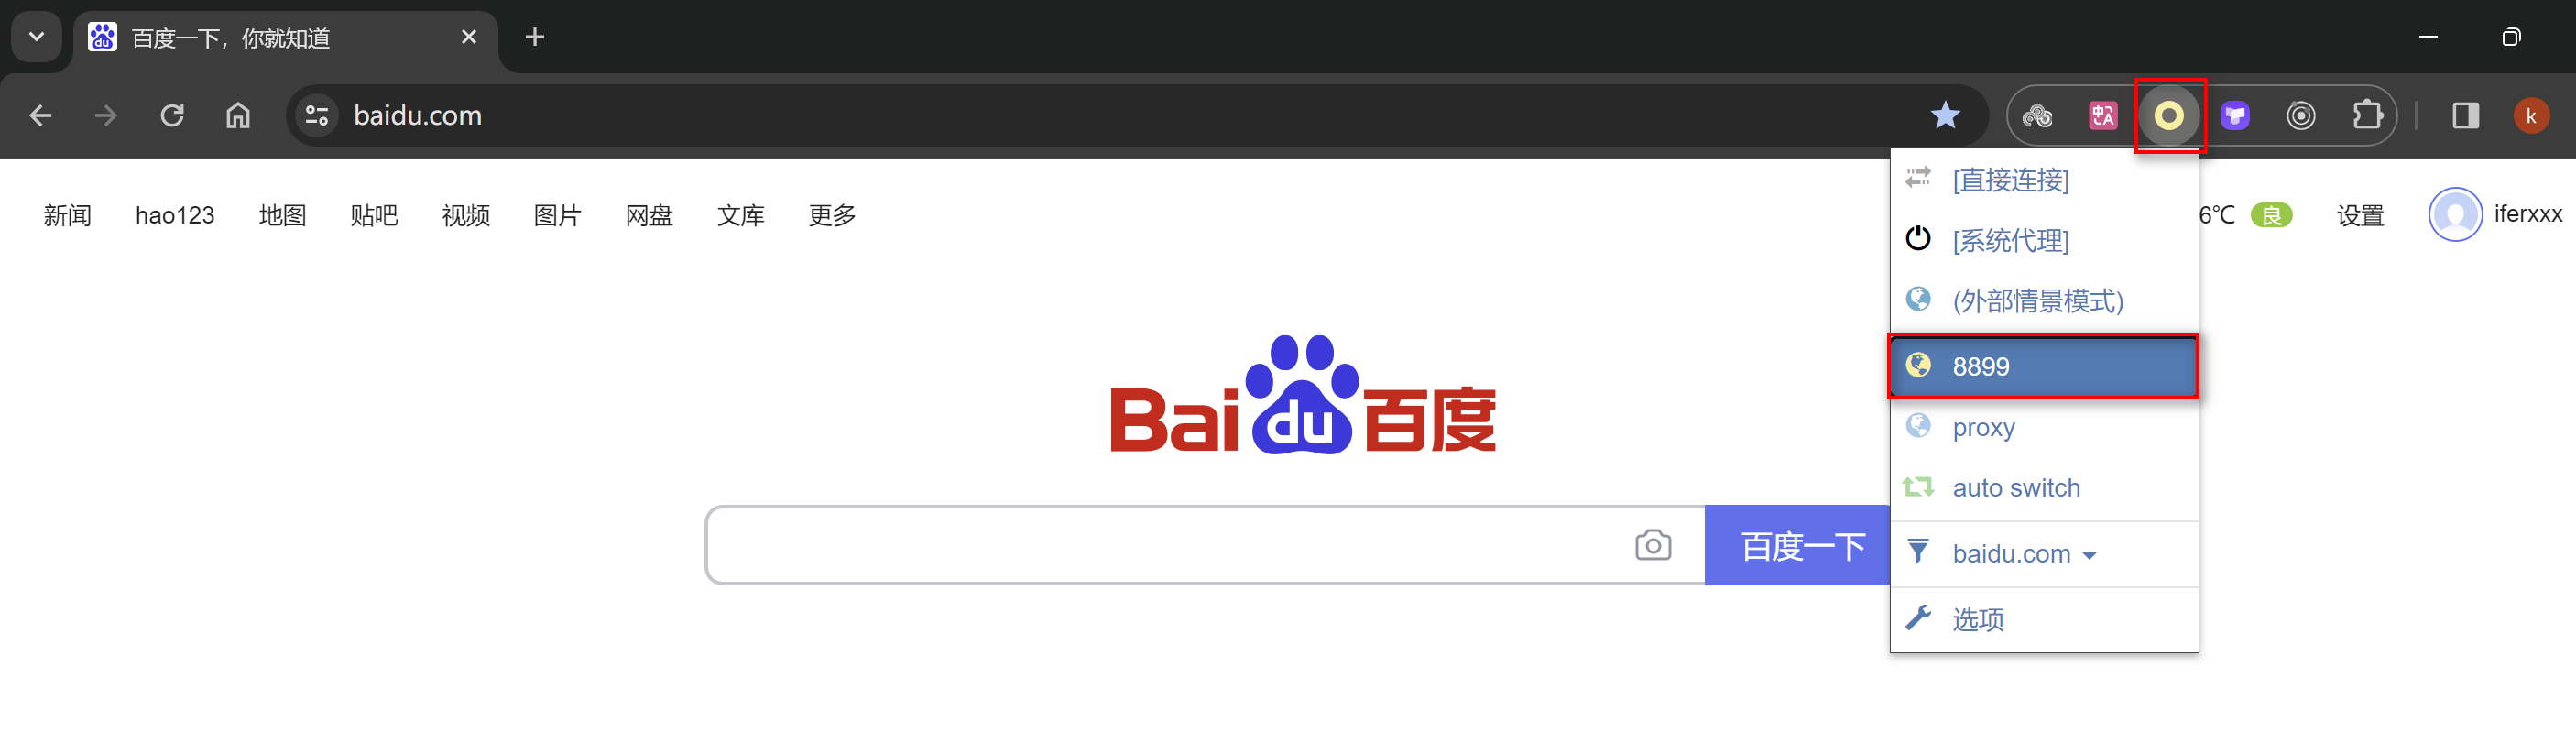
证书的安装 SwitchyOmega Chrome 中安装此插件需要科学上网,若不能,可通过这儿 下载。
场景:域名映射 配置方式
1 2 3 ifer.com 127.0.0.1:3000
场景:域名转发 场景:模拟 HTTPS 1 2 https://ifer.com 127.0.0.1:3000
场景:Mock 数据 1 2 3 https://ifer.com/api/users tpl://{mock.json}
场景:代码注入 注入 CSS
1 https://www.baidu.com css://C:\Users\dangp\Desktop\dailiceshi\baidu.css
注入 JS,引入 vconsole 进行手机端调试
1 2 3 4 https://www.baidu.com jsPrepend://{vconsole.min.js} https://www.baidu.com jsPrepend://{vconsole.js}
1 new VConsole ({ theme : "dark" });
如何使用插件? https://github.com/whistle-plugins
例如前面的 vconsole,其实已经有插件集成好了,我们只需要安装即可,如下:
打开 Plugins 面板,看到已经安装成功,可以在 Rules 内通过以下配置使用:
1 www.baidu.com whistle.inspect://vconsole
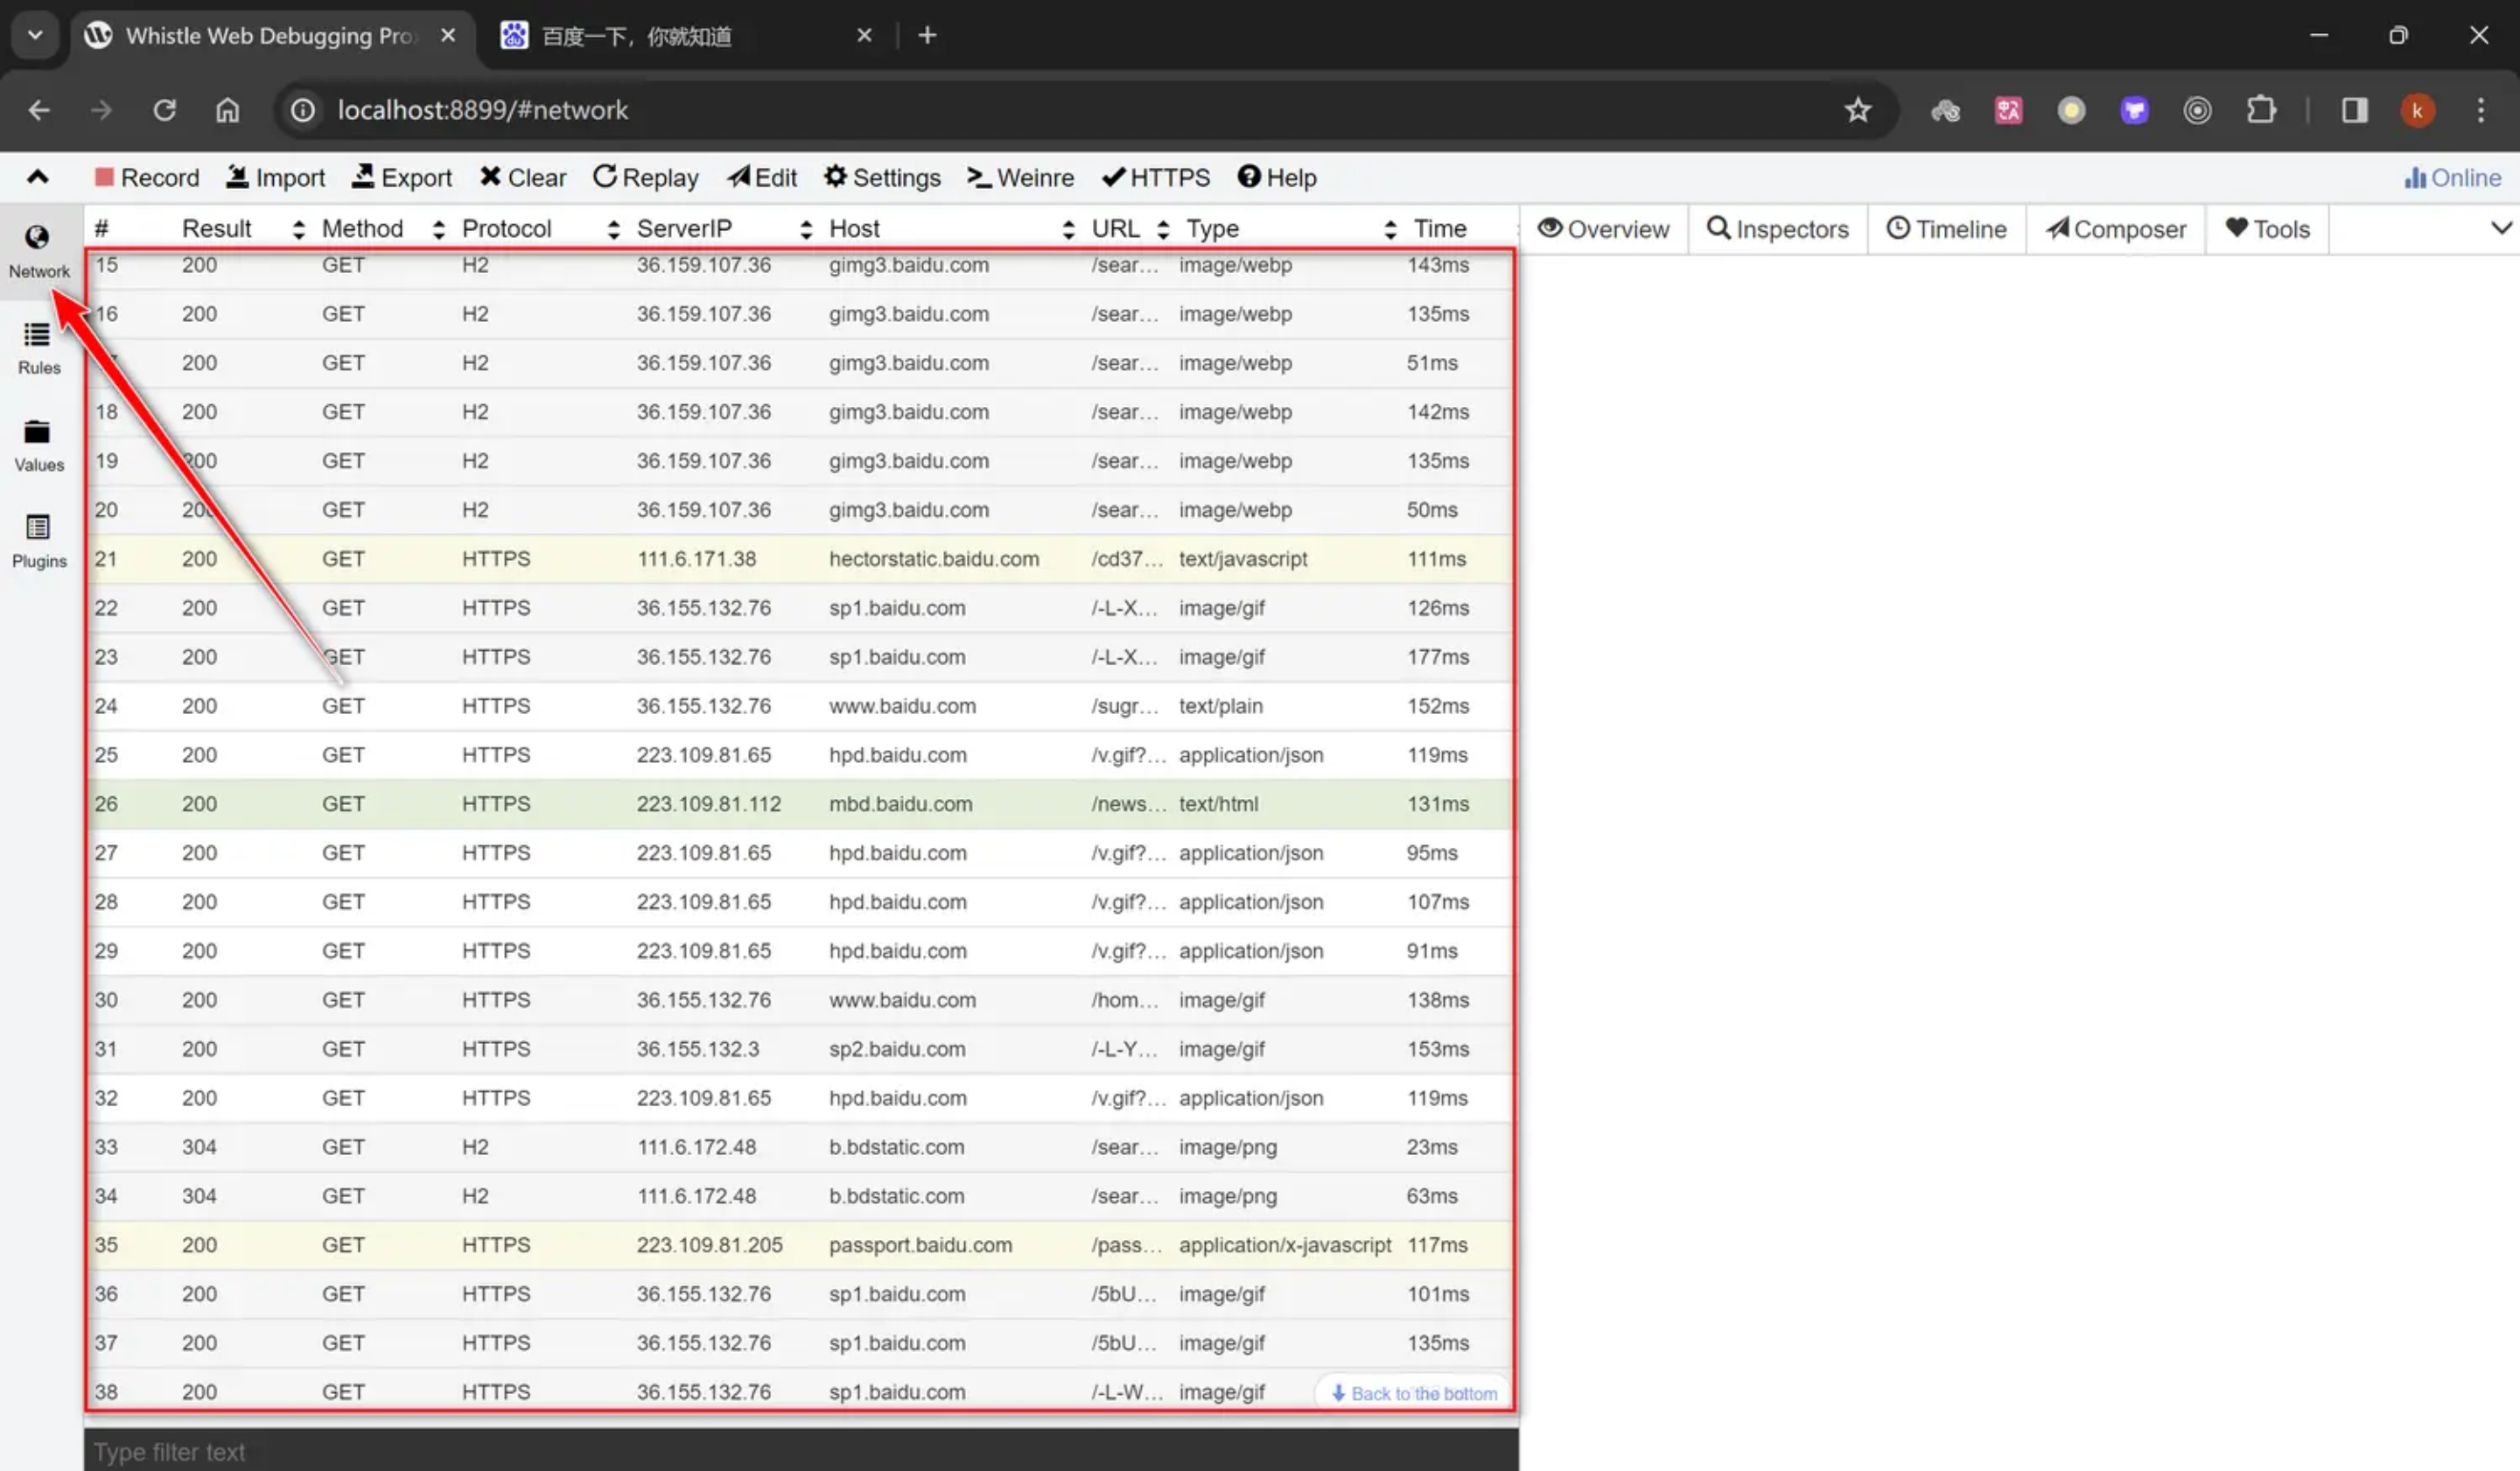
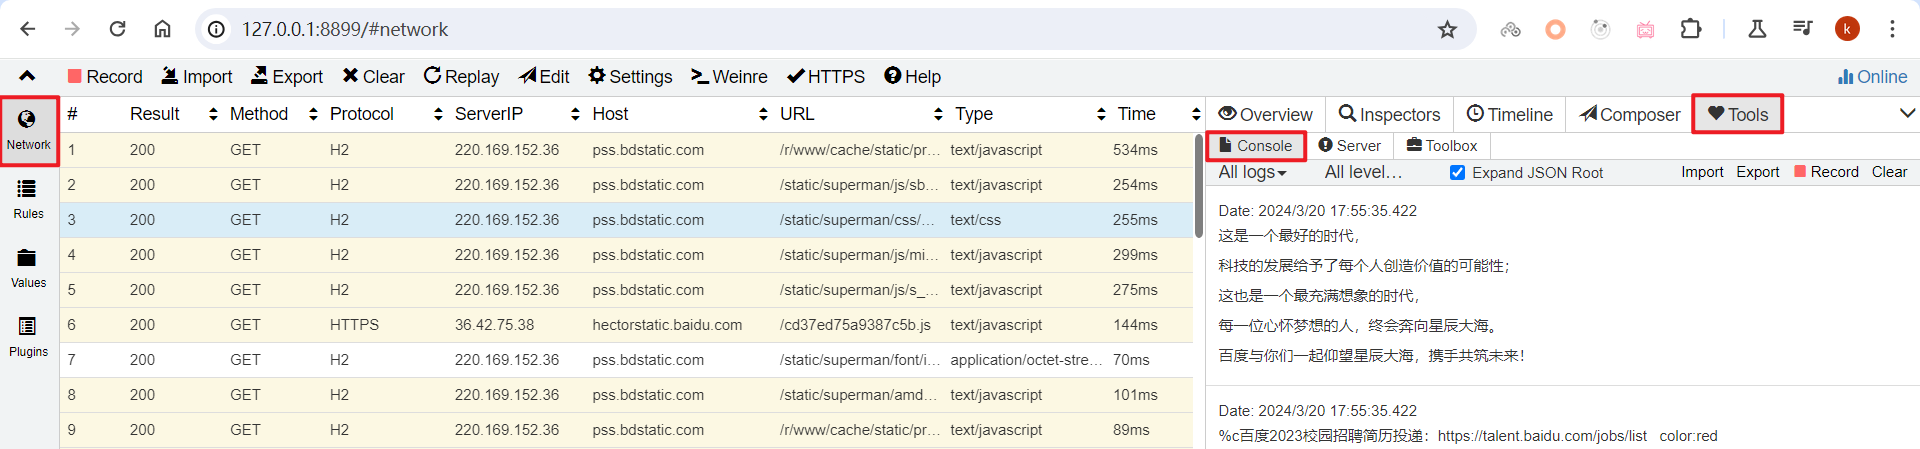
如何查看 Log 输出 主要用于调试远程页面特别是移动端页面,可以通过此功能把远程页面 console 打印的信息展示出来。
1 https://www.baidu.com log ://
场景:请求转到本地文件 1 2 ifer.com C:\Users\dangp\Desktop\dailiceshi\index.html
场景:调试线上代码 替换线上的 JS 文件为本地的,然后断点调试。
1 https://pss.bdstatic.com/static/superman/js/lib/jquery-1-edb203c114.10.2.js C:\Users\dangp\Desktop\dailiceshi\a.js
a.js
1 2 debugger ;console .log ("~~~~~~" );
🤠 清空缓存并硬性重新加载。
场景:跨域处理 操作方式 1
两者一致:请求的地址和 whistle 代理的地址(当浏览器访问 https 的本地 IP 时测试未成功)。
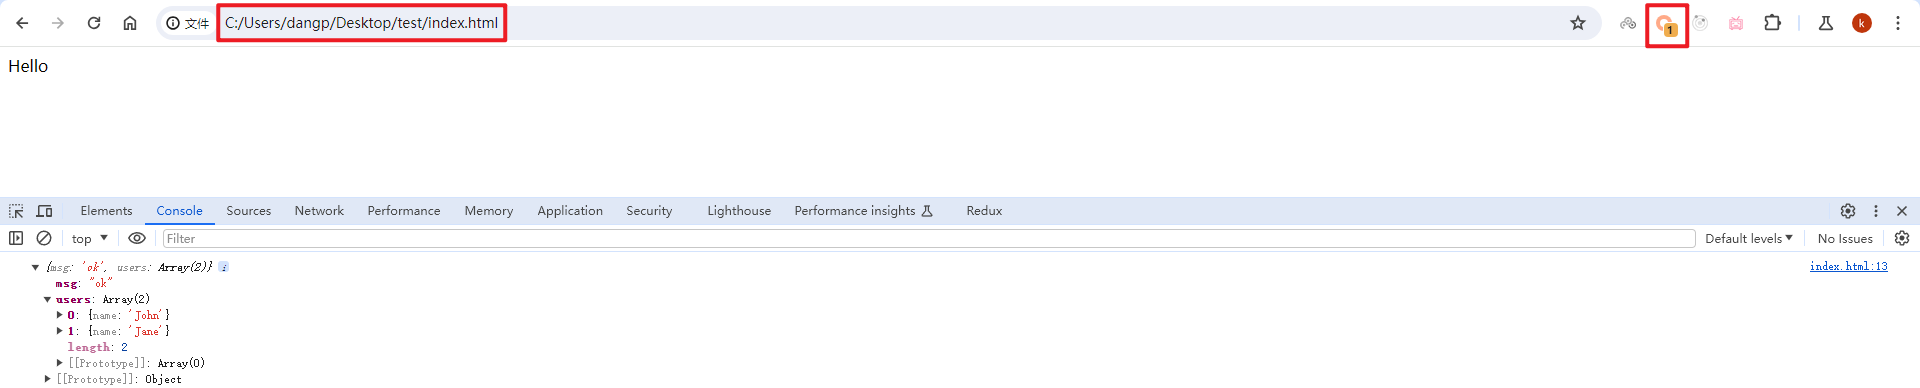
需求:浏览器如下方式打开文件时,期望拿到请求数据(明显是跨域了)。
前端代码如下(注意把下面的 IP 换成自己本机的):
1 2 3 4 5 6 7 8 9 10 11 12 13 14 15 16 17 18 <!DOCTYPE html > <html lang ="en" > <head > <meta charset ="UTF-8" /> <meta name ="viewport" content ="width=device-width, initial-scale=1.0" /> <title > Document</title > <script src ="https://cdn.jsdelivr.net/npm/axios@1.6.8/dist/axios.min.js" > </script > </head > <body > Hello <script > axios.get ("http://10.229.32.136:3001/api/users" ).then ((response ) => { console .log (response.data ); }); </script > </body > </html >
后端代码如下:
https://10.229.32.136:3001/api/users
1 2 3 4 5 6 7 8 9 10 11 const express = require ("express" );const app = express ();app.get ("/api/users" , (req, res ) => { res.send ({ msg : "ok" , users : [{ name : "John" }, { name : "Jane" }], }); }); app.listen (3001 , () => console .log ("Server is running 3001..." ));
whistle 配置如下:
1 2 http://10.229.32.136:3001/api resCors://*
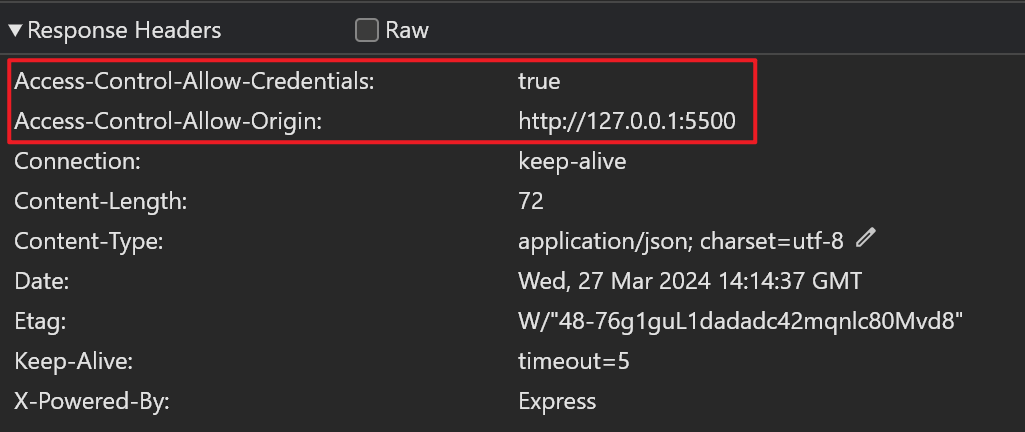
原理,返回响应头:access-control-allow-origin: *
跨域时,需要携带 Cookie 可以换成如下配置:
1 2 http://10.229.32.136:3001/api resCors://enable
多了个响应头:access-control-allow-credentials: true
或者文件请求携带 Cookie 配置如下:
1 <script crossorigin ="use-credentials" src ="https://cdn.jsdelivr.net/npm/axios@1.6.8/dist/axios.min.js" > </script >
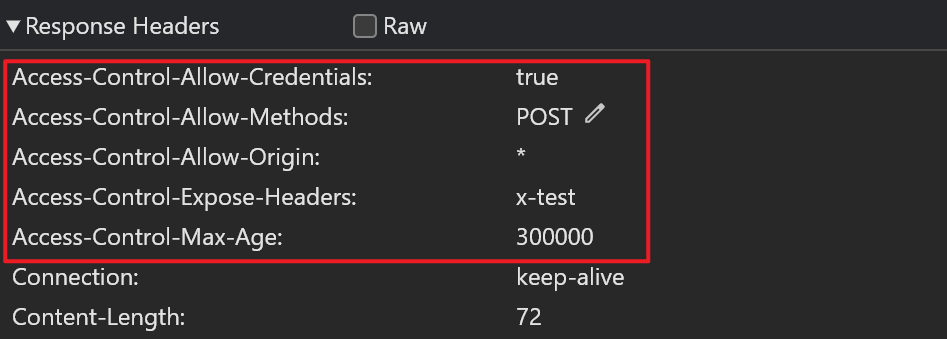
如果配置信息较多,可以抽离到某个文件,如下:
1 http://10.229.32.136:3001/api resCors://{test-resCors.json}
test-resCors.json
1 2 3 4 5 origin: * methods: POST headers: x-test credentials: true maxAge: 300000
操作方式 2 把请求地址改成当前网站域名试试。
三者一致:浏览器的域名,请求的地址,代理的地址(用 127.0.0.1 未测试成功)。
1 2 3 4 5 6 7 8 9 10 11 12 13 14 15 16 17 <!DOCTYPE html > <html lang ="en" > <head > <meta charset ="UTF-8" /> <meta name ="viewport" content ="width=device-width, initial-scale=1.0" /> <title > Document</title > <script src ="https://cdn.jsdelivr.net/npm/axios@1.6.8/dist/axios.min.js" > </script > </head > <body > Hello <script > axios.get ("/api/users" ).then ((response ) => { console .log (response.data ); }); </script > </body > </html >
whistle 配置如下:
1 https://10.229.32.136:5500/api http://10.229.32.136:3001/api
模仿百度 http://127.0.0.1:5500/
1 2 3 4 5 6 7 8 9 10 11 12 13 14 15 16 17 18 19 20 21 <!DOCTYPE html > <html lang ="en" > <head > <meta charset ="UTF-8" /> <meta name ="viewport" content ="width=device-width, initial-scale=1.0" /> <title > Document</title > </head > <body > 我是假的百度 <script > fetch ("https://www.baidu.com" ) .then ((res ) => { return res.text (); }) .then ((res ) => { console .log (res); document .documentElement .innerHTML = res; }); </script > </body > </html >
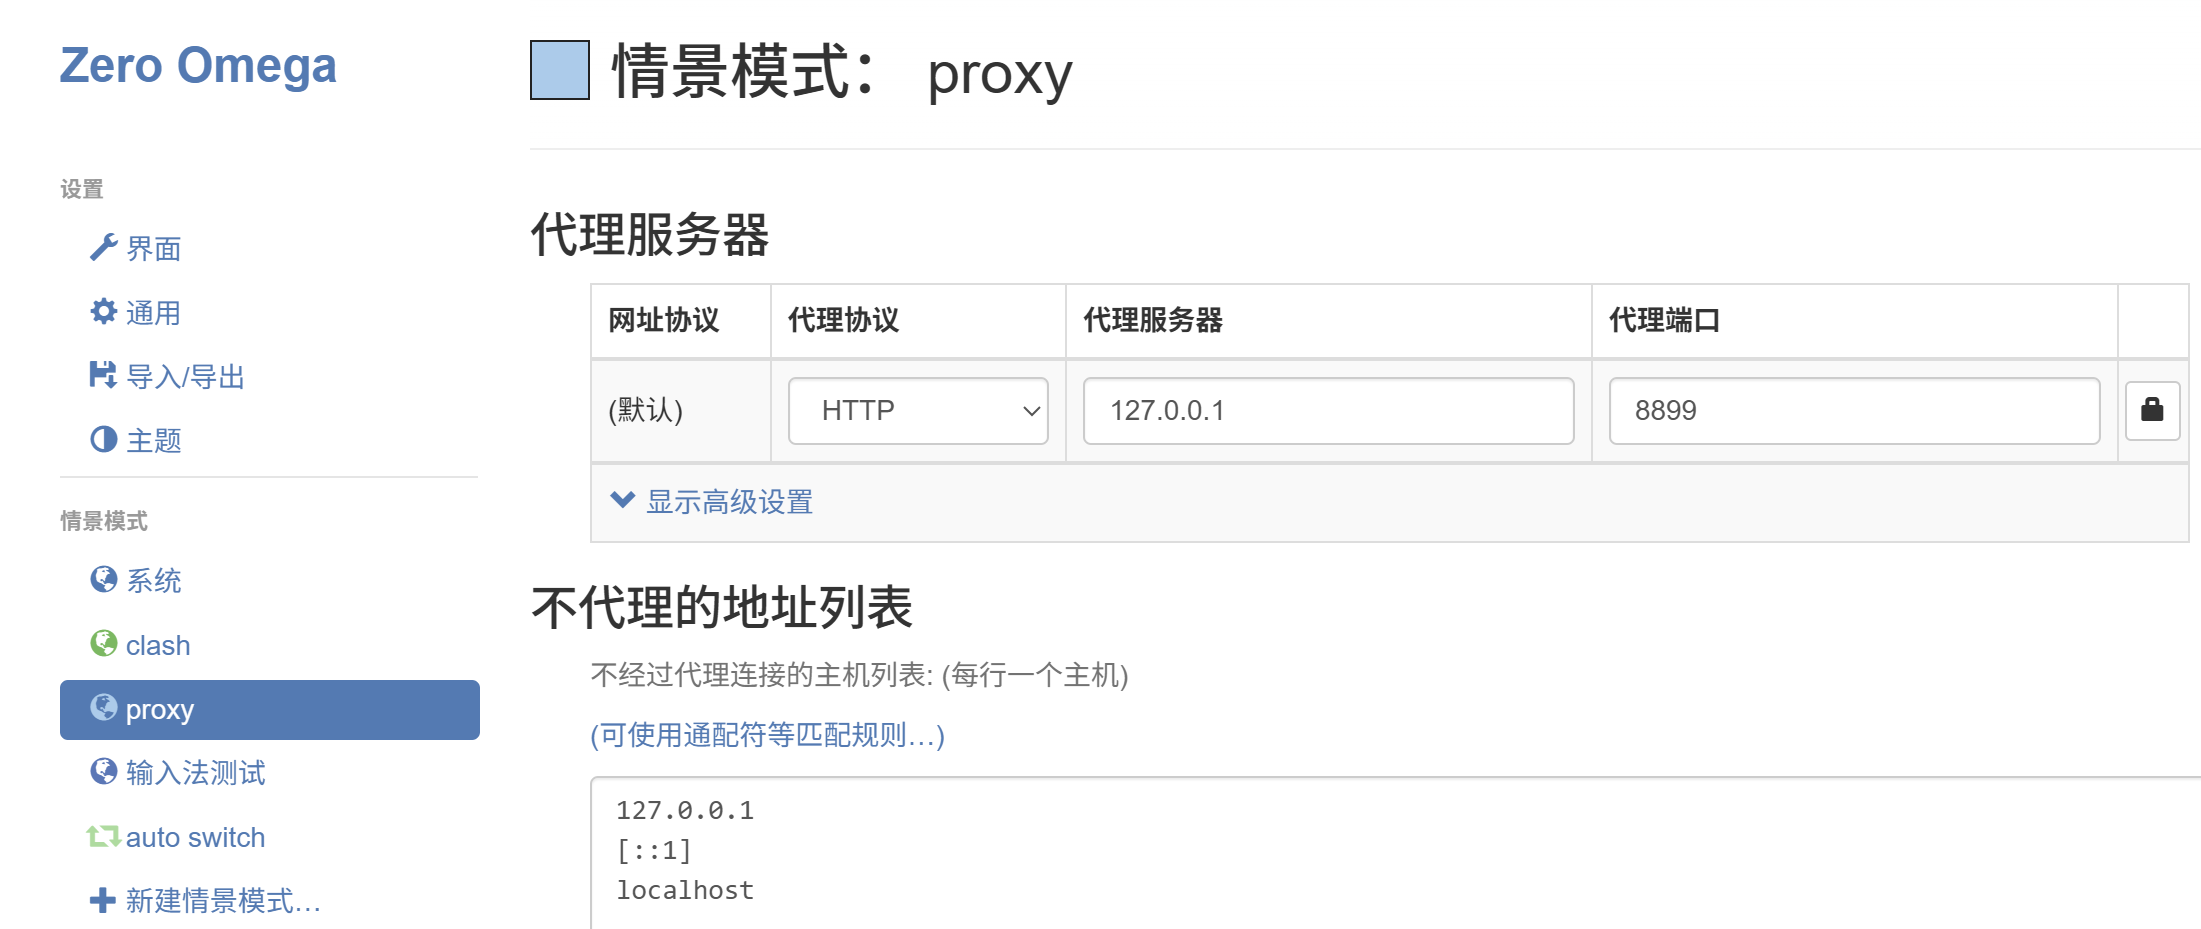
修改 switchyOmega 中不代理的地址列表为:
原列表:
1 2 3 127.0.0.1 [::1] localhost
whistle
1 2 3 www.baidu.com resCors://* http://127.0.0.1:5500/s www.baidu.com/s http://127.0.0.1:5500/sugrec www.baidu.com/sugrec
截图操作 1 2 3 4 5 6 7 8 9 10 11 12 13 14 15 16 17 18 19 20 21 22 23 24 25 26 27 <!DOCTYPE html > <html lang ="en" > <head > <meta charset ="UTF-8" /> <meta name ="viewport" content ="width=device-width, initial-scale=1.0" /> <title > Document</title > </head > <body > <button id ="oBtn" > 截图</button > <br /> <img border ="0" src ="https://www.runoob.com/images/logo.png" alt ="runoob.com" /> <script src ="https://cdn.bootcdn.net/ajax/libs/html2canvas/1.4.1/html2canvas.js" > </script > <script > oBtn.addEventListener ("click" , function ( html2canvas (document .body , { useCORS : true , }).then (function (canvas ) { const a = document .createElement ("a" ); a.href = canvas.toDataURL (); a.download = "download.png" ; a.click (); }); }); </script > </body > </html >
1 2 www.runoob.com resCors://*
实践
1 2 3 4 api.bilibili.com reqCors://https://www.bilibili.com api.bilibili.com resCors://* *.biliimg.com referer://https://www.bilibili.com